Friday, May 27, 2011

bars and sunshine

Well, by the time I am writing this, we HAD sunshine. It is once again overcast. Boo.

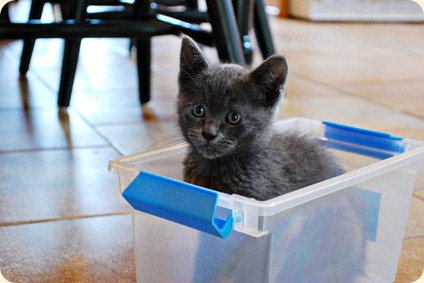
While we lived it up a few days ago Mark was arrested for driving under the influence of being 4 …

DSC_1020

He was humiliated…

DSC_1024

And Susie was very troubled over the tiniest bits of dirt that make their way into her boots…

DSC_1037

DSC_1043

DSC_1044

She decided it might be easier to go without… until one tiny pebble stuck to her foot and she comes to me grabbing her foot saying, “Ow. Ow. Ow.” She says that when tiny grains of sand get in her boots too. That or, “Eeeew.”

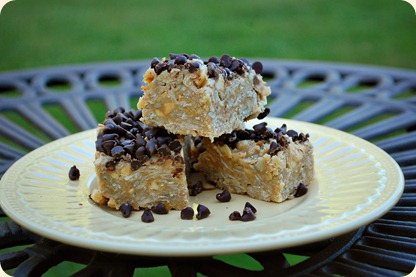
These are not eeeew….

DSC_1047

I found them to be super delicious and filling enough for breakfast with a cup of joe. Got the recipe from Darby but will list it here…

Homemade Chewy Granola Bars

1 C peanut butter* {or sunflower butter}
2/3 C honey
1/2 C coconut oil**
2 C oats
2 total cups of a combination of coconut flakes, sunflower seeds, & pumpkin seeds*** {or your own combination of nuts & dried fruit}
mini chocolate chips to sprinkle on top

In medium size sauce pan melt together peanut butter, honey and coconut oil.

Remove from heat and add oats, sunflower seeds, pumpkin seeds and coconut. Stir well.

Press mixture into pan {I used my “Perfect Brownie” pan that is 11″ x 7″}, if you use a 9 x 13″ you don’t have to fill it all the way, just spread to your desired thickness and sprinkle {while still warm} with chocolate chips. Chill for 2 hours in fridge and cut into bars.

* My friend tried with natural peanut butter but they didn’t set up well… I think un-natural peanut butter {you know, like Jif} is the way go in this recipe.
**I found coconut oil at Publix, it’s hard {almost like wax} I think it’s kinda important to the consistency of the bars, let me know if you have success with another oil.
*** I found my sunflower seeds & pumpkin seeds in the bulk bins in the Publix produce section. I love that you don’t have to buy a ton and I think their prices are great… and I LOVE their dried cherries!

And you can also cut this recipe in half, which is what I did originally but wished I had doubled, so I went ahead and doubled it for you!

Okay, even though she specifically says her friend tried natural PB and it didn’t work, I still want to try it. These are a great alternative to store bought, sugar filled Chewy bars that don’t fill me up at all, but I would feel better if I weren’t eating a bunch of Jiff. Delicious, though. Might have to be a rebel and try the natural stuff. For the combination portion I just used half coconut flakes, half salted sunflower seeds. Oh, and I think their Publix might be our Fred Meyer – that is where I found my coconut oil, in the Nutrition Center.

That’s all I got! Peace!

Thursday, May 26, 2011

cork trivet

So wayyy back at Christmas I neglected to share this quick and easy craft with you. It was a gift for my mom, so I couldn’t share till after the holidays, and then I just forgot.

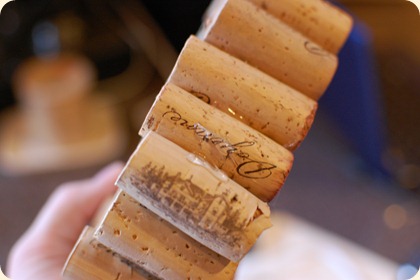
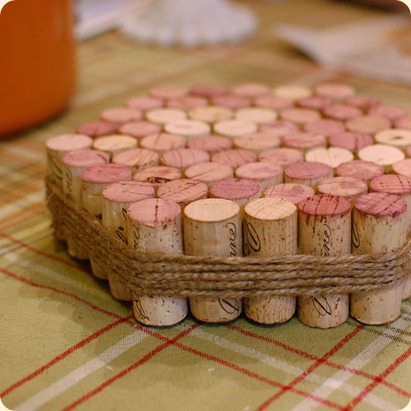
I didn’t take a picture of the beginning, but I took one cork, put a line of hot glue down one side, and stuck another cork to it, parallel. Then I worked my way around that cork until it was surrounded by a circle of other corks, and kept working my way around and out, like rings of a target…

DSC_1339

DSC_1342

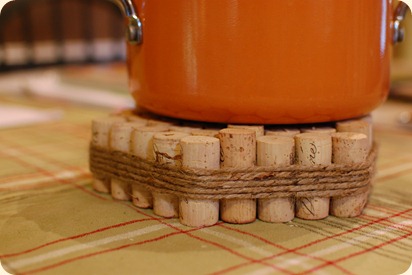
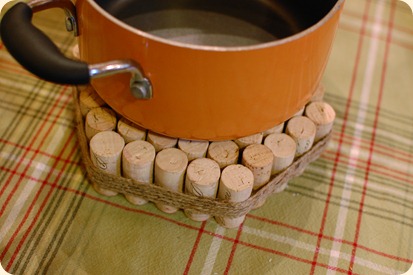
And to be quite honest, the magazine where I got the idea showed a picture of one that was nice and round, and mine came out like a hexagon, and I’m not sure why. I reached a point where it was going to turn into a weird shape with gaps on the edges if I kept going, so I stopped. I’m okay with a hexagon. Here is how it turned out…

DSC_1345

DSC_1346

I think it is cute. I wrapped jute around mine because there were places you could see the glue. Corks from red wine are stained, and I put those all to one side so mom could choose to show the red or not…

DSC_1347

Cute, quick, and easy. My kind of craft. Makes me feel a little guilty for giving it as a gift!

Speaking of guilt… Yesterday I had a babysitter while I was working. That night, it was bedtime and I told Susie to get her Zeebs - her zebra that she sleeps with every night and cuddles his little tail in her chubby little hand next to her chubby little cheeks. She went to the front door when I told her to get him and I said, “Susie, where is your Zeebs?” and Mark proceeded to tell us that when the babysitter and the kids got back from their walk, the ‘neighborhood dog’ stole Zeebs out of our yard and ran away with him! HOW RUDE! Now I know how everyone else in the neighborhood felt when our dog used to steal their gloves, sprinklers and yard toys. :’( But poor Susie last night was sad and refused to hold the other stuffed toy I gave her. What a mean neighborhood dog. I thought I had guilt when people’s sprinklers showed up in our yard and I didn’t know who’s it was to give it back to… imagine that dog’s owner’s guilt when he came home with a child’s beloved toy! I am praying that Pier 1 still has those knitted stuffed zebras!


Wednesday, May 25, 2011

Mexican Cooking–Carne Asada, Rice & Beans - UPDATED

***Hey all. Sandy came over and made rice and beans again and I didn't get this recipe quite right the first time, so I made some tweaks!***

Whoa, I am blogging about food all the time. This is weird. I just feel obligated to share good recipes with you all! The latest of my Mexican Cooking lessons is no exception. This one was at the request of the Logger…

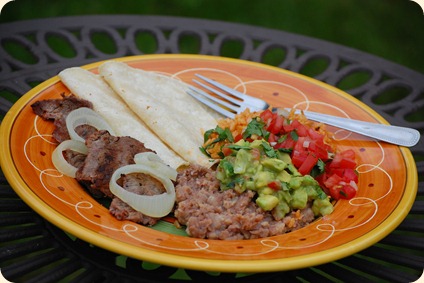
Authentic Mexican Carne Asada with Rice & Beans - UPDATED

DSC_1092

{ingredients – including pico de gallo and guacamole}

1 small bag pinto beans

2-3 lb. boneless beef roast

salt

1 to 2 cloves garlic

2 limes

2 small onions, diced

1 small onion, sliced

1/2 a beer

3-4 avacados, chopped

14 romas, chopped

1 bunch cilantro, chopped

5-6 jalepenos, diced (adjust for how hot you like it)

1 small bag brown long grain rice (or white)

cooking oil

6-inch corn tortillas

1/2 of a 14 oz can crushed tomatoes or tomato sauce

sour cream for serving

{instructions}

Rinse beans, put them in a large pot and follow instructions on the bag, cooking them for approximately two hours.

Soak rice in hot water for about 20 minutes.

Very thinly slice the entire roast. Think about the thin carne asada meat you get at a Mexican restaurant. Put the meat slices in a large bowl and add 2 teaspoons salt, the garlic, juice of 1 lime, several slices of onion and the half of a beer. Stir and let marinade while preparing other items.

Put 2-3 tablespoons oil in a deep frying pan on M/H. Drain rice and add to skillet, stirring occasionally until browned. Add the half can tomatoes, 1/2 cup of the diced onions and 1 1/2 cups water. Simmer covered for about 30 minutes or until rice is soft and water has evaporated. If water evaporates and rice is not yet done, add a little more water and continue cooking until done.

Make pico de gallo and guacamole (recipes here), with remaining produce, but reserve the sliced onions.

Add about one tablespoon salt to the beans, to taste. We made about 2/3 of the beans into smashed refried beans and left the other 1/3 whole. To do this, use a ladle to remove 2/3 of the beans from the pot when they are tender (use the ladle, scoop by scoop, draining off some of the water from each scoop but not all of it). Add to a frying pan with 2 tablespoons of very hot oil. Smash with the bottom of a drinking glass over low heat, adding a little water if they become to thick or dry and more salt if needed.

Put a dab of oil on a tortilla and rub it together with another tortilla so that each is very thinly coated, repeating for each side of each tortilla. Fry tortillas in a dry skillet until hot and set them inside a folded piece of foil to stay hot.

Put remaining onion slices into a foil packet and drizzle with oil. Place on BBQ grill until translucent or soft. Start grilling the thin slices of meat in batches, for a couple minutes on each side until done.

Items can be plated and eaten with a fork (my method) or made into little tacos with the tortillas (the Logger’s method). I love putting a bunch of pico de gallo over my rice!

This one wasn’t too complicated. Slicing the meat and making the pico de gallo and guacamole were a little time consuming, but your beans have to cook for a couple hours anyway, so it didn’t feel crazy.

In family news, the Logger has finally started his long-awaited supercross season. Please pray for me. =)

DSC_0908

DSC_0889

DSC_0911

DSC_0914

DSC_0921

DSC_0922

I need to work on my timing for getting tack-clear shots of this high-speed action and also getting better jump shots. He worked very hard… did you know motocross is supposed to be the second most physically demanding sport in the world? Second only to soccer (which I play – haha, you know I rub that in). He is realizing that in his old age he is going to have to workout to keep up with the young guns and be more competitive. I am looking forward to watching this season because A) it is closer to home than most of the off-road races he was doing, B) I can actually see the whole course from one spot, as opposed to the off-road/trails courses he was doing, and C) there are grandstands with huge fenced grass area for the kiddos to be wild maniacs. I am not looking forward to watching this season because he has a history of bodily injury during this type of racing. It is very stressful to watch because I envision the dirt bike videos where a racer has a horrific crash and then everyone behind him piles up or runs him over, making it even more horrific, during said crash, Ty is laughing and does not seem worried at all, meanwhile I want to barf. You can imagine how it is when I am watching it in real life and it is my husband on the line out there!

In very important fashion news, Leah, I wore my new jeans to the race and rocked the messy cuffs…

DSC_0931

Kinda hard to tell at that angle, but did I do it right? They were both messy, even though it only looks like one.

Well, I’ll be back with another recipe soon! Oh, and a little project too. =) Peace!

Tuesday, May 17, 2011

Mexican Cooking - Tortilla Soup

Wow – I have been posting lots of recipes lately – probably because I am in a bratty phase of cooking whatever I want and letting my family like it or leave it. It may sound rude but I was totally in a rut trying to please everyone else and it sucked the motivation to cook right out of me. And there was not much motivation there to begin with. It was either I cook nothing, or I cook what I want. So for a week or two, I am making some of MY favorites and trying some new recipes. And really, everyone has been happy with everything so far! Funny how that works. It probably wasn’t as big a deal as I was making it out to be in my mind. =)

Well the Tortilla Soup was a no brainer – there is no authentic Mexican dish known to man that the Logger does not devour in complete satisfaction. Even cow tongue tacos. That’s gross – forget I mentioned it.

Without further aimless rambling, here is the recipe, as I learned it from my dear friend Sandy.

DSC_0957

Authentic Mexican Tortilla Soup

{ingredients}

2 1/2 tablespoons oil

1 onion, finely chopped

5 jalapenos

6 roma tomatoes, chunked

6 cloves garlic, finely chopped, reserve 1 teaspoon

1 teaspoon cumin, divided

1 can diced tomatoes

3 limes

5 chicken breasts, cubed

salt

8 cups chicken stock or water + bullion cubes

2 to 3 dozen 6-inch corn tortillas

1 lb. cheese shredded (pepper jack, or colby are great)

3 avocados

1 bunch cilantro

1 bunch green onions

16 oz. sour cream

{directions}

Add oil to large pot. Sautee onions and peppers on medium heat until translucent. Add roma tomatoes, cook a couple minutes. Add garlic, cook a couple minutes. Add cumin, the can of tomatoes and juice of 1 lime. Return to a boil and simmer about 10 minutes; it should become mushy. Remove from pot and blend in a food processor or blender in batches, set aside.

Combine chicken with 1/4 teaspoon of the cumin, the reserved teaspoon of garlic, the juice of 1/2 a lime and 1/4 teaspoon salt. Cook the chicken in the large pot (which you cooked the vegetables in; now empty) with 1/2 tablespoon of oil on medium or medium high until done. Return the sauce to the pot with the chicken. Add the water or chicken stock. Return to a boil and then keep warm.

Slice a few dozen corn tortillas into 1/2 inch strips and fry them in batches in 1/4 inch of oil in large skillet over medium-high heat until crispy, removing to a bowl lined with paper towels.

To prepare the toppings, shred the cheese, chop the remaining limes into small chunks, chop the avocados, finely slice the green onions and chop the cilantro. Ladle soup into a bowl and top with a dollop of sour cream, handful of cheese, some avocados, cilantro and green onions, a squeeze of lime, and finally, the crispy tortilla strips.

I really wasn’t overly excited about this dish until I tried it and then went back for seconds and thirds! I didn’t know what I had been missing. So good! Pretty easy too! It served 6 adults and 3 children!

PS. I am a bad blogger… two weeks ago Sandy made me enchiladas. And I am not talking about those slimy red slugs most people call enchiladas – I’m talkin’ bout some MEXICAN enchiladas. With salsa verde. And spicy potatoes. Don’t be afraid. So, I confess my blogging blunder to you and will bring you this recipe ASAP. Partly because you need these enchiladas in your life and it is my duty as your fellow American with underdeveloped taste buds to pass it on, but mostly because I am like a fat kid – I cannot stop thinking about them! The Logger bravely took the only leftovers we had and I came home ravished after a soccer game late one night and just about threw a brat-fit right there in the light of the midnight glow of the refrigerator. I’m still cranky about it.

PPS. That was the longest post-script ever.

PPPS. If you are tired of my kitten pictures, don’t read this.

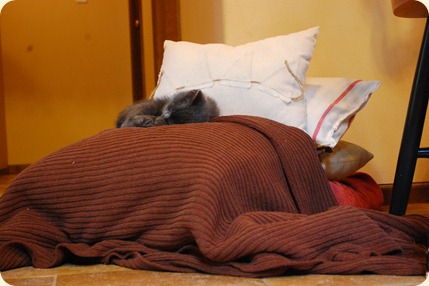
The girls made this “king bed” for our kitten while playing King Solomon and he fell asleep on it…

DSC_0959

How sweet is that? It looks like a real king bed piled high with pillows!

DSC_0961

And my sweet birthday gift from Leah looks like his crown! It is a sweet little pillow with bunting on it! It is upside down in the picture and looks like the points of a crown. Sandy's girls pointed that out to me. Kids are so creative.

Peace out! For reals this time!
Monday, May 16, 2011

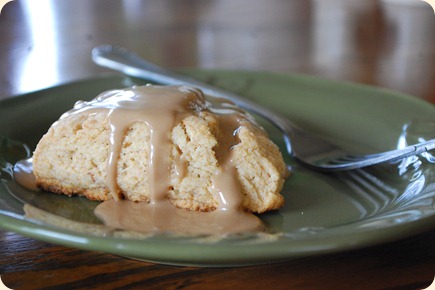
maple. pecan. scones.


DSC_1000


This post wouldn’t even require words if not for the angry mob that would show up on my doorstep YELL at me in the comments, demanding the recipe because they need one of these, like, NOW. 

And trust me, you want to make them.  Truuuuuussst me.  Me and my scone-induced food-baby.  So I will enlighten bless you abundantly with the recipe:  you can find them in PW’s amazing cookbook.  For those of you salivating and in the first stages of a panic attack because you don’t have her cookbook, I will give you the recipe.  Right here, right now. 


Maple Pecan Scones

by Pioneer Woman, Ree Drummond


    {for scones}

3 cups AP flour

1/3 cup sugar

5 teaspoons baking powder

1 teaspoon salt

1/2 lb. (2 sticks) unsalted butter, chilled

1/4 cup pecans, plus more for sprinkling if desired

1 large egg

3/4 cup heavy cream

    {for maple icing}

1 lb. powdered sugar

1/4 cup whole milk

4 tablespoons (1/2 stick) butter, melted

Splash of strongly brewed coffee

Dash of salt

2 teaspoons maple flavoring or extract

    {directions}

Preheat oven to 350 degrees.

In a large bowl, stir together flour, sugar, baking powder, and salt.

Cut the cold butter into small pieces and cut into flour mixture with pastry blender until mixture resembles course crumbs.  Finely chop pecans and stir them into flour mixture.

Mix the egg and the cream together and add to the flour mixture, stirring until just combined.

Turn the mixture onto a cutting board, the mixture will be crumbly, but do not let your heart be troubled.  Push the mixture together into a large ball.  Don’t knead or press too much; you want to leave that gluten alone!  With a rolling pin, very gently roll the dough into a disc about 3/4 inches thick.  With a sharp knife cut the round into eight equal-size wedges.

Transfer the wedges to a baking sheet  and bake for 22 to 26 minutes, until they just start to brown.  Do not allow the edges to become dark or the Red Coats will come and get you.

Allow them to cool completely before icing.  In a medium mixing bowl, stir the icing ingredients until smooth.  Pour generously over the scones. (Optional: sprinkle chopped pecans over the icing before it sets.) Allow the icing to set before serving with yummy coffee.


You will be so glad you did.

My random variations to the recipe: I split the dough in two and then followed her instructions, making 16 small scones instead of 8 huge ones.  I also substituted 1 cup of the flour for Bob’s Red Mill Whole Wheat Pastry Flour.  Oh, and I also left out the butter from the icing because it got lumpy the first time and I also put in too much milk so when I remade it, I left out the butter and it worked just fine.  AND, I used a stand mixer – do people really still cut butter in by hand tools?   

PS.  Would you all please give me a round of applause because I took a food picture that does not look gross?  Thank you.

PPS.  You will be thanking me from the treadmill after you make these and eat 8 of them.  The exercise is worth it. 

Saturday, May 14, 2011

felt flowers and spritz


So, here I am, back with the second craft that I did for my Awana girls’ goody bags.  I can actually keep a blogging schedule with no children underfoot!  Thanks, Mom!

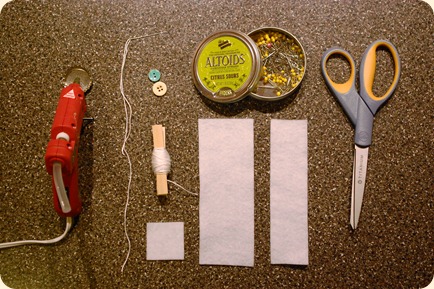
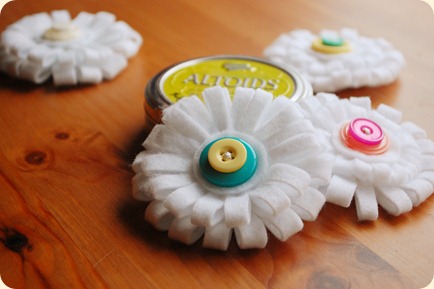
So these felt flowers are pretty simple.  The how-to was featured in Woman’s Day Magazine and can be found online here.  Their colors are so pretty – you should check it out for better color inspiration.


Simple cast of characters… 

DSC_0709


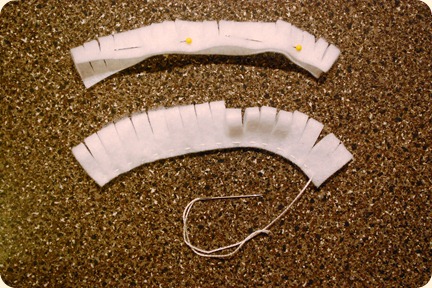
Some pinning, sewing and snipping…

DSC_0714


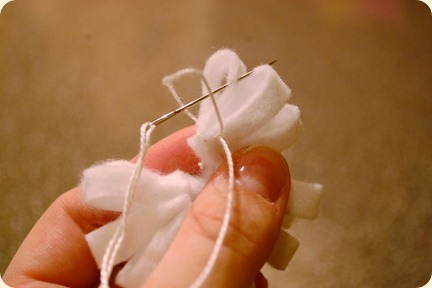
Gathering the felt to one end, folding in half to stitch the ends together to form the circle which will be each flower…

DSC_0716

[that picture looks like I am sewing through the loops – I am not, I don’t know why I stuck the needle there.  If you are going to make them, see the instructions.]


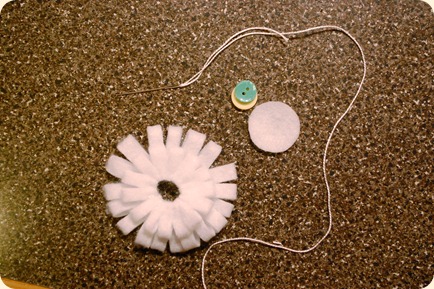
Once you have your large and small flowers made, hot glue them together and then hot glue a felt circle to cover the hole in the back and stitch your buttons on the front, through the circle on the back and tie off…

DSC_0718


And, then you get…

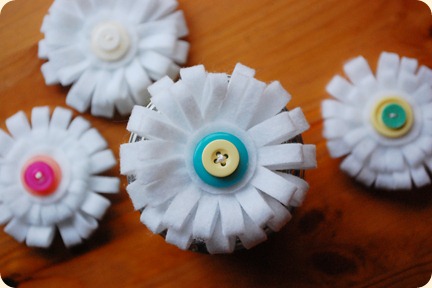
DSC_0728

DSC_0730

I didn’t sew close enough to the edge and didn’t have buttons large enough to cover my stitching, so I had to put a felt circle on the front as well.

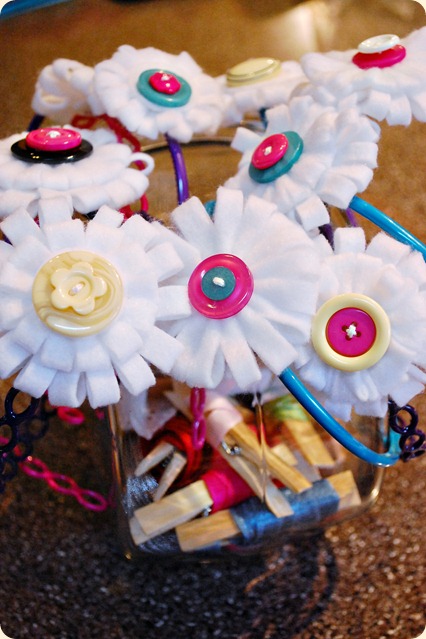
I was a little sad that I only had white felt, and Sarah brought a few colors and we didn’t to use them!  But we did the girls’ flowers up with bright buttons and put them on headbands for the girls…

DSC_0753

I found some bright, cheap gift bags at Target and looped the headbands around one of the handles on each bag, so the flowers showed…

DSC_0761

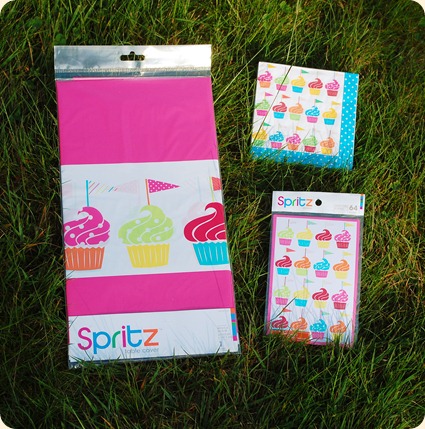
By the way, the gift bags are part of a line at Target I recently noticed on the party aisle, called Spritz

DSC_0756

I tried my best to link you to it but can’t find any of it online – not sure if they just don’t sell it online or if it is too new.  But I love it!  I was on one of those trips where I am “just getting these two items on my list”… Well I just got those two items and these…

DSC_0745

I purchased a tablecloth (biggest, $2.59), napkins (blue border, $1.39) and stickers (pink border, $1.99).  I could not resist.  So Susie’s second birthday party is 7 months away, but it will be full of cupcakes and flags!  There was even a bunting with cupcakes on it, but the cheap crafter in me came out and I’d rather make a fabric one that she can have for ever than buy a plastic one.  But it was cute.

DSC_0750

I can’t wait until that party.  They also had other ‘themes’ and boy ones, too.  Impressed.

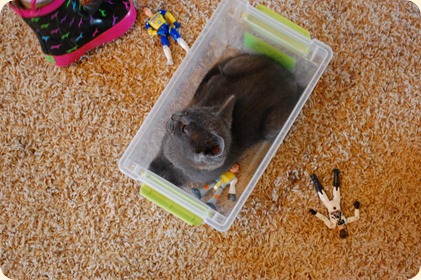
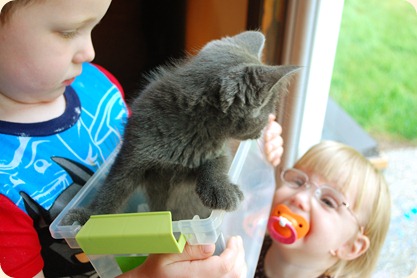
Okay, I really don’t want to be one of those people who post their cat photos online, but I do want to be helpful and let you know that if you have a) children or b) a kitten, a plastic bin will keep them entertained for most of the day.

Exhibit A:

DSC_0671

Exhibit B:

DSC_0696

Exhibit C:

DSC_0702

And they’re also good for organizing.  Mark puts his annoying toy sets -with lots of small pieces and guys which make a huge mess  all over the house and drive me crazy- inside the boxes.  He has about eight boxes.  He knows that he can play with one set at a time then has to put them back in the box and put that one away before he gets out another one or I put the boxes he leaves out and the toys that belong in them into hiding for a week.  So far it is going well and saving my sanity! 

Well go have a good weekend in the sunshine… or sunbreaks… or non-rain… this day is going downhill; keep your chin up!  Peace out.

Friday, May 13, 2011

bookmarks and little ones


First off, this is my little spring windowsill…

DSC_0611

Even though I recently put in wood blinds on this window and I have to move all the junk out of the way to put them down every night, I still love the cheery stuff there.  My grass eggs have since been tossed.  I thought Mark would be all excited to give them “haircuts” before I tossed them, not so much.  He thought I was really weird.  Those tissue and pipe cleaner flowers are so cute!  Mark made then in children’s church, one for each person in our family, even Susie.  I think I might leave them out for the rest of my life.  Or at least next week.

Okay, so this past Wednesday was awards night at Awana, which I dread all year – truly, when they ask me if I will lead an Awana class, the first thought that goes through my head is, “Crap!  If I say ‘yes’ then I will have to use a microphone and stand in front of all the kids and parents at the awards night at the end of the year and remember peoples’ names with everyone staring at me and hand out awards!” And then I proceed to say ‘yes’ anyway and worry about it all year and then praise Jesus that I don’t say anything stupid up there (yet).  It is one of many faith builders He so wisely puts in my life I guess.  So Sarah (my wonderful co-teacher) and I got together and made up a couple crafts for the girls’ goody bags; one of which I will share today, and I’ll be back to share the other one tomorrow or Monday.

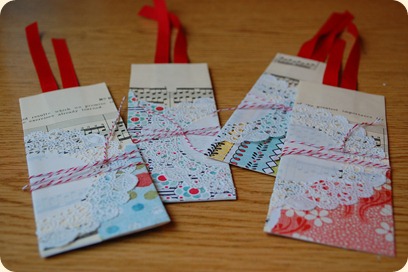
We made bookmarks, inspired by AshleyAnn’s layered paper bookmarks

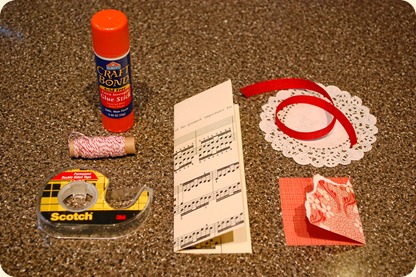
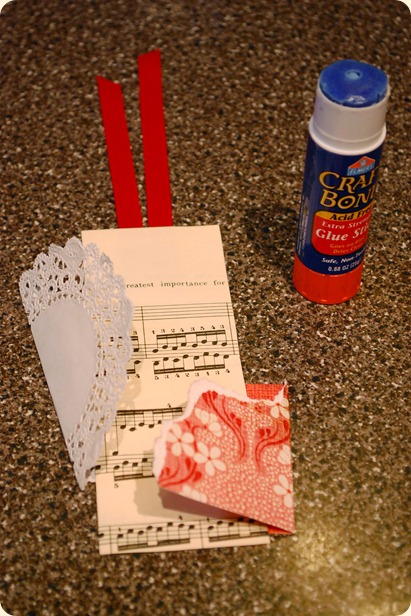
For the most part they are made of simple materials you probably have around the house…

DSC_0765

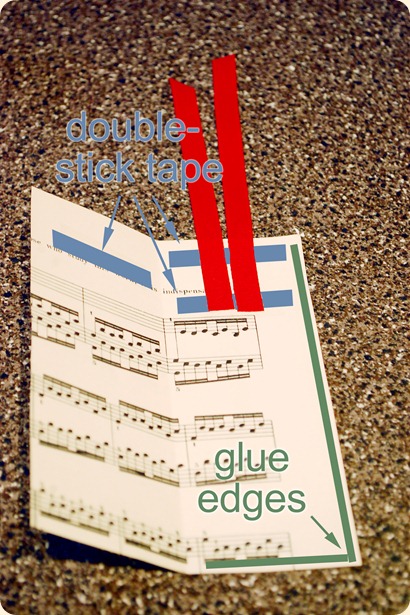
It looks like she used an old gardening book, but I had a music book I picked up for crafting from Goodwill.  You could use all glue stick or all double-stick tape but I liked a to tag team it with both.  Then paper and ribbon scraps and I used paper doilies and baker’s twine.

This was so simple…

DSC_0767

DSC_0771

DSC_0774

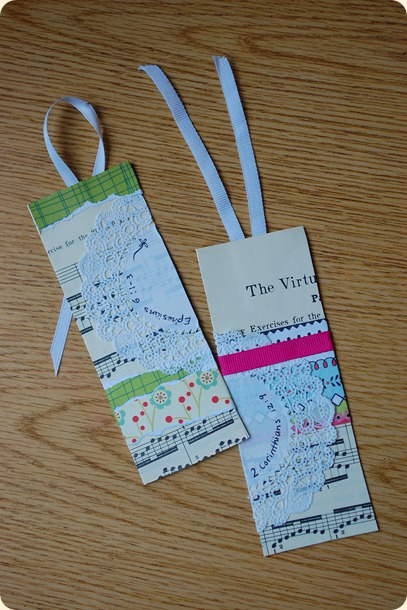
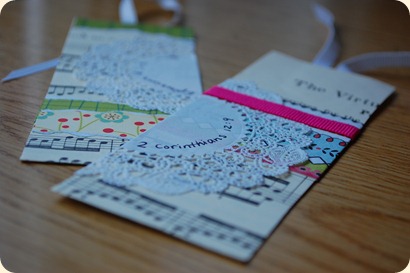
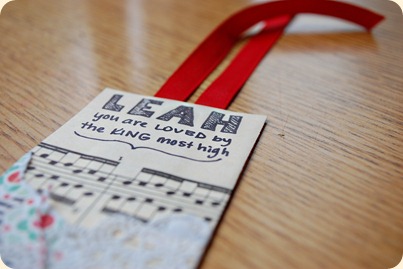
We finished them off by referencing a Bible verse on the doilies.  This is my favorite of Sarah’s and my favorite of mine that we made for the girls…

DSC_0759

DSC_0760

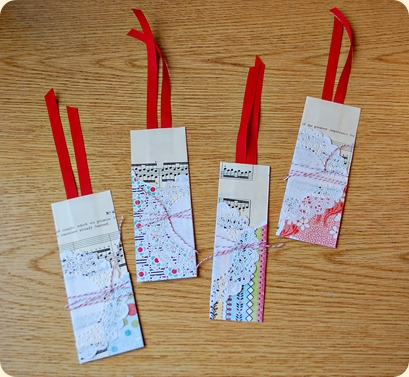
And some more I made later…

DSC_0775

DSC_0777

You could use any scraps or supplies you have in your stash that inspire you.  On some of ours we used fabric strips as ribbon and even some flat eyelet trim. 

I made one for my Mom for late Mother’s Day (I will see her this weekend), and one for someone else…

DSC_0778

Leah moved away from me and now every time I do a craft, I feel like I need to make one for Leah to cheer her up, but she’s probably doing just fine and maybe it is more to cheer me up…?  Not sure.  But I will get this in the mail today, Leah!  And I am guessing you will not complain about me coping by crafting for you!  =)

So the newest baby in the family is starting to venture outside under our careful supervision…

DSC_0731

Cautious of every noise and flutter…

DSC_0735

DSC_0734

DSC_0733

And look what I noticed going on after I shot these pictures…

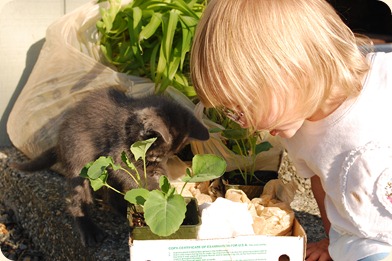
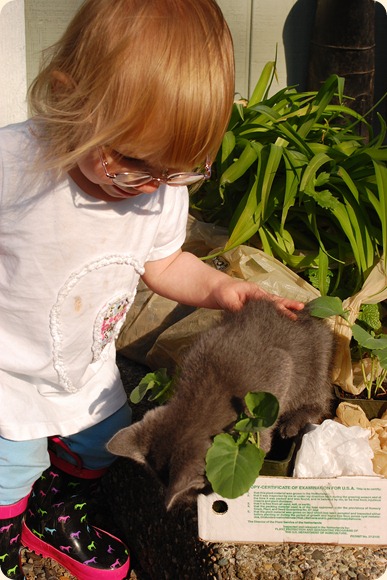
Oh, hey, there little kitty, are you squishing Mama’s plants?

DSC_0738


Wait, kitty, come back, you missed one…

DSC_0739


There we go… almost got it…

DSC_0740


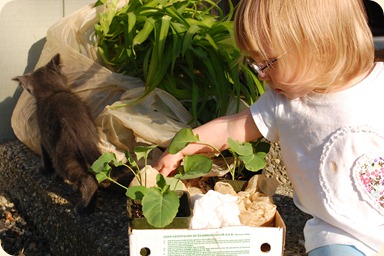
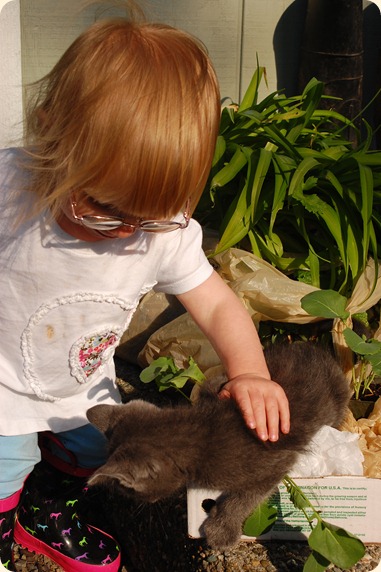
Let me just help you squish it down a little more…

DSC_0741


Um, maybe I should be a little less concerned with capturing pictures and pay a little more attention to what is going on!  Look at her squishing him down onto the plant!  What stinkers – both of them!  I saved the little broccolis before they were completely devastated.  And this was several days ago, so in case you are wondering, Nadine, I did get those lilies and herbs planted!  The tomatoes are going to be repotted and kept in my kitchen window for a bit and the broccolis will go in the garden this weekend when I get my layout figured out!  Thank you so much!

My wonderful mother has the kiddos, giving me a long, relaxing weekend, so I will be back some more!  Peace.